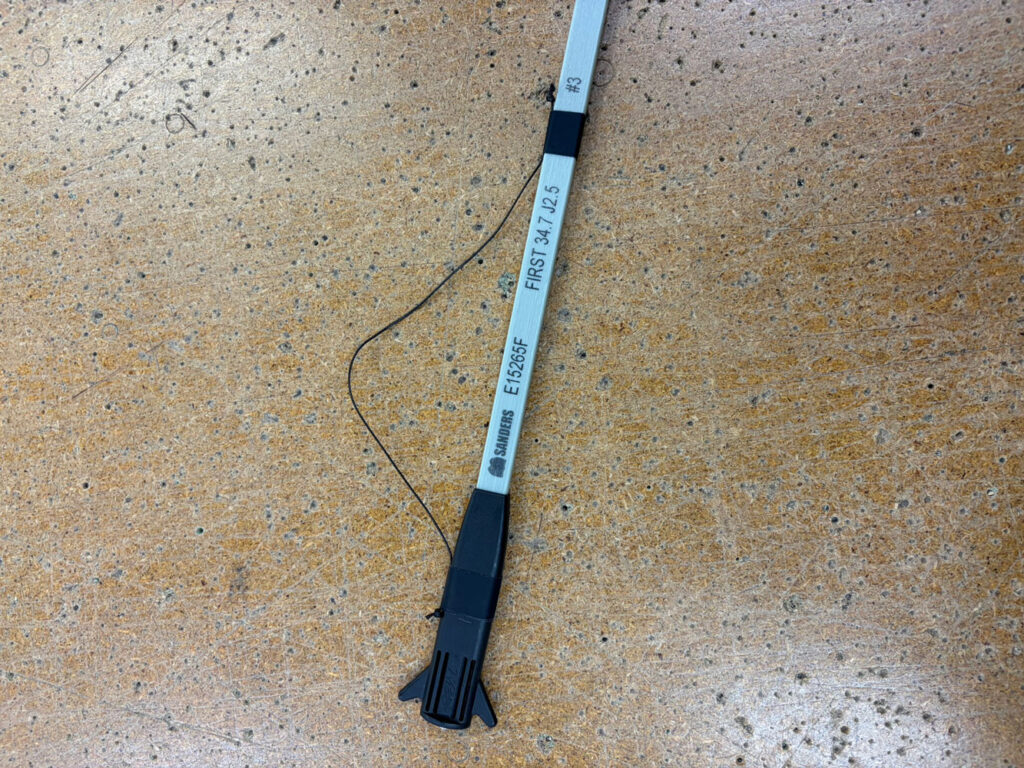
Step 1: Prepare the Sail and Battens
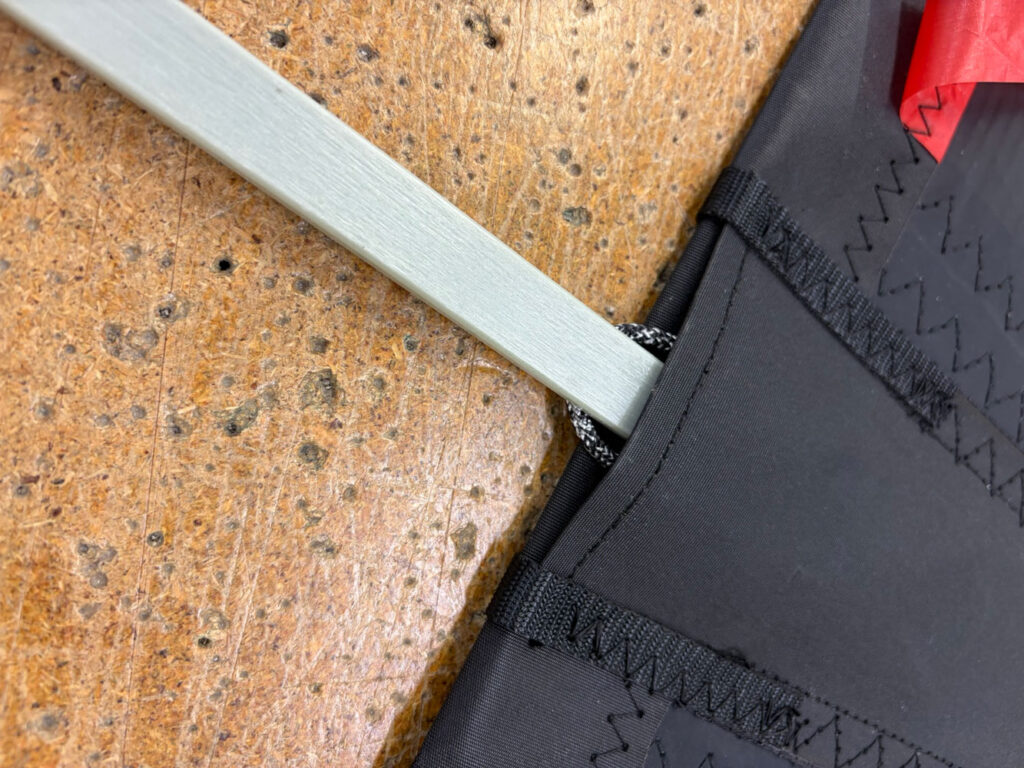
Lay the sail out flat with the batten pockets facing upwards. Identify each batten and check any markings or labels so you know which pocket it belongs in. On most labelled sets, the numbering indicates the batten order – follow the labels on your battens and work methodically pocket by pocket. Before inserting the batten, locate the 3mm loop sewn into the leech at the end of the pocket and slide the batten over the top.
Step 2: Insert the Batten
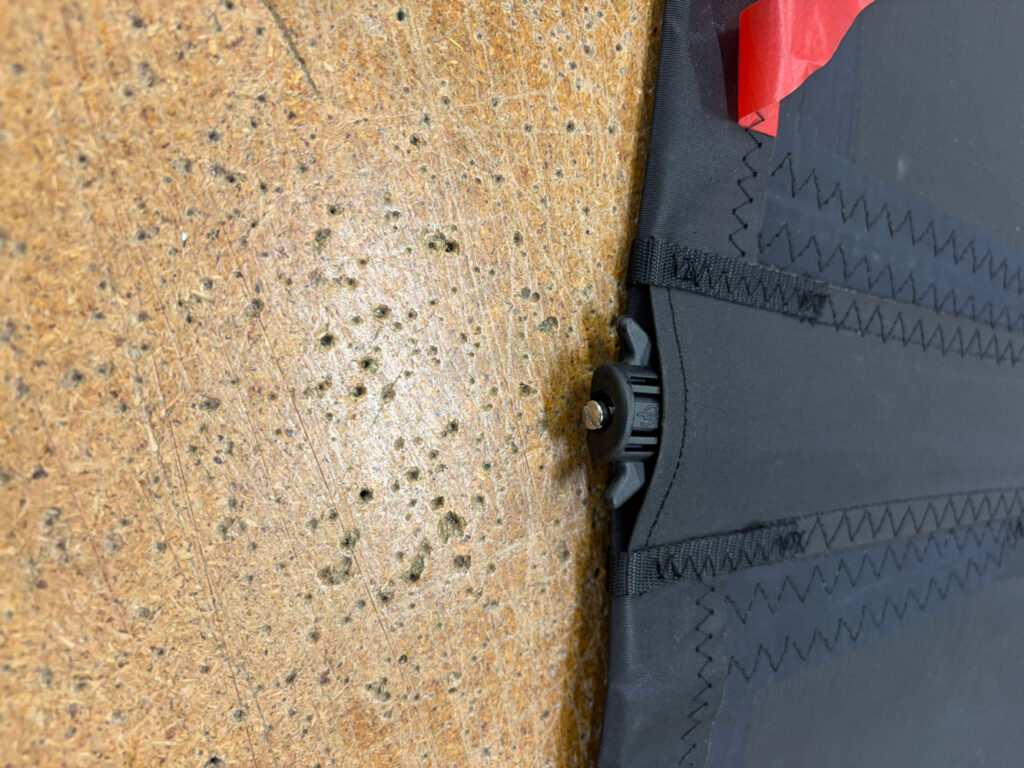
The RBS rocket will already be attached to the end of the batten and retained by a thin Dyneema safety line. This line prevents the rocket from dropping away from the batten and makes removal quicker at the end of the day. Check the orientation of the rocket: it has a small lip on one side which should face up. Push the batten smoothly into the pocket until it is fully home, with the rocket sitting neatly inside the leech end.
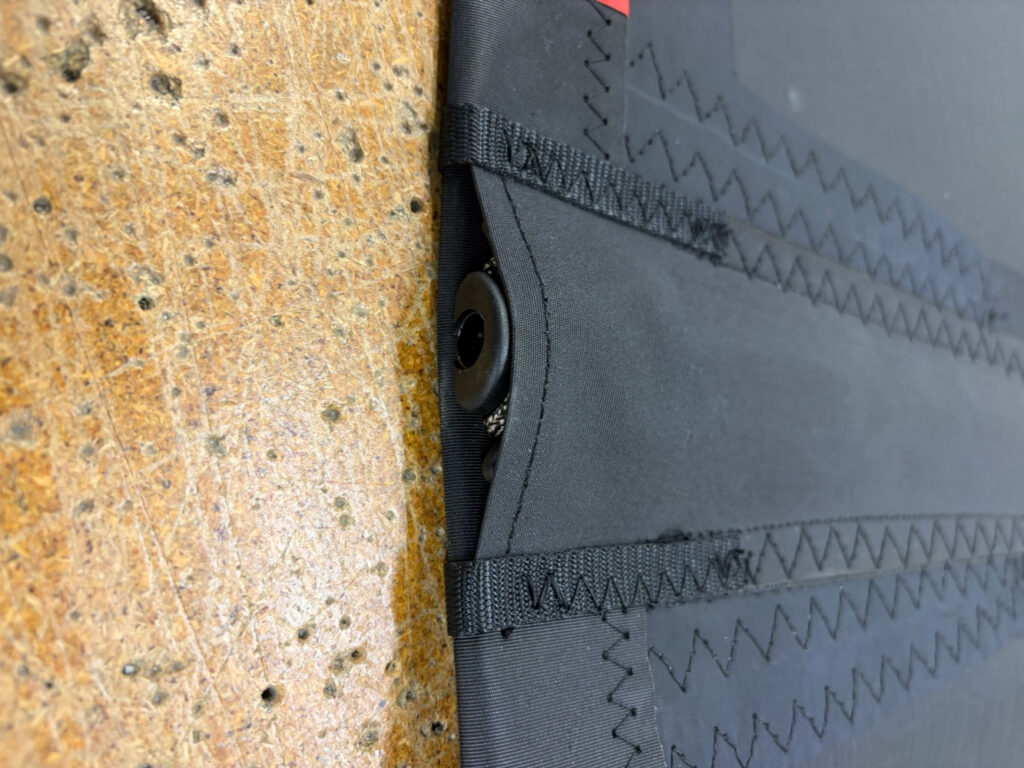
Step 3: Apply Batten Tension
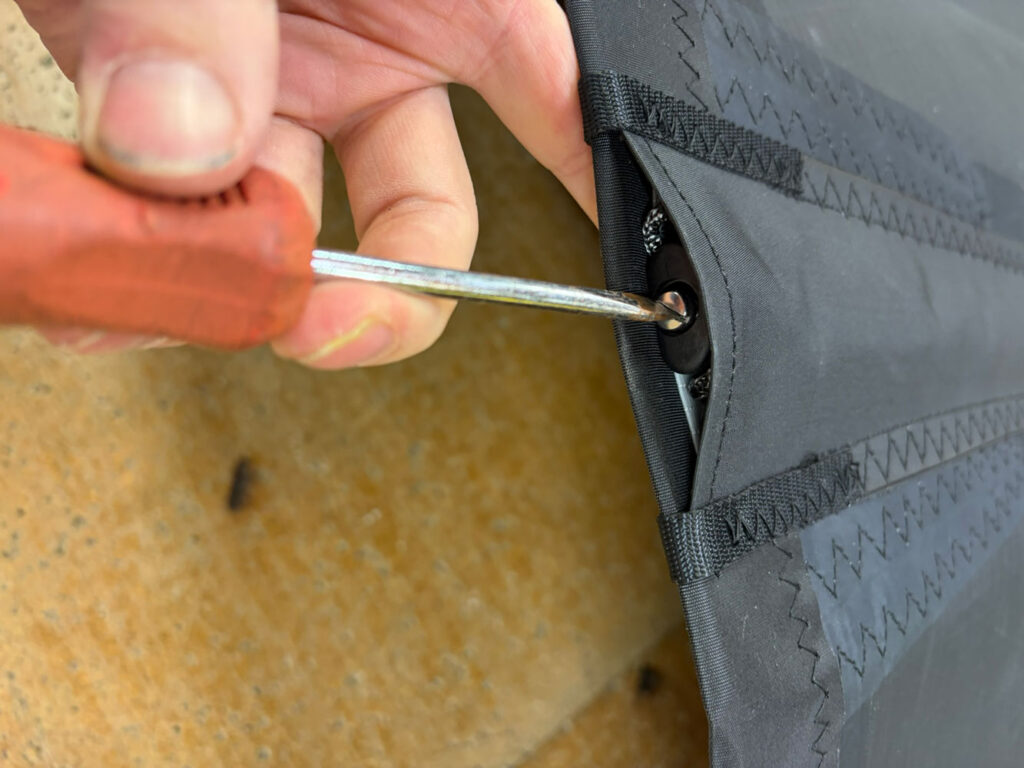
Once the batten is fully inserted, hook the 3mm loop over the top of the rocket. This loop acts as the anchor point that the rocket tensions against. You will see the adjustment screw at the end of the batten. Turn the screw clockwise to apply tension gradually. The aim is for the batten to sit firm and stable, with the batten end finishing close to flush with the leech when correctly tensioned. Small variations between pockets are normal with a difference of ± 5mm expected.