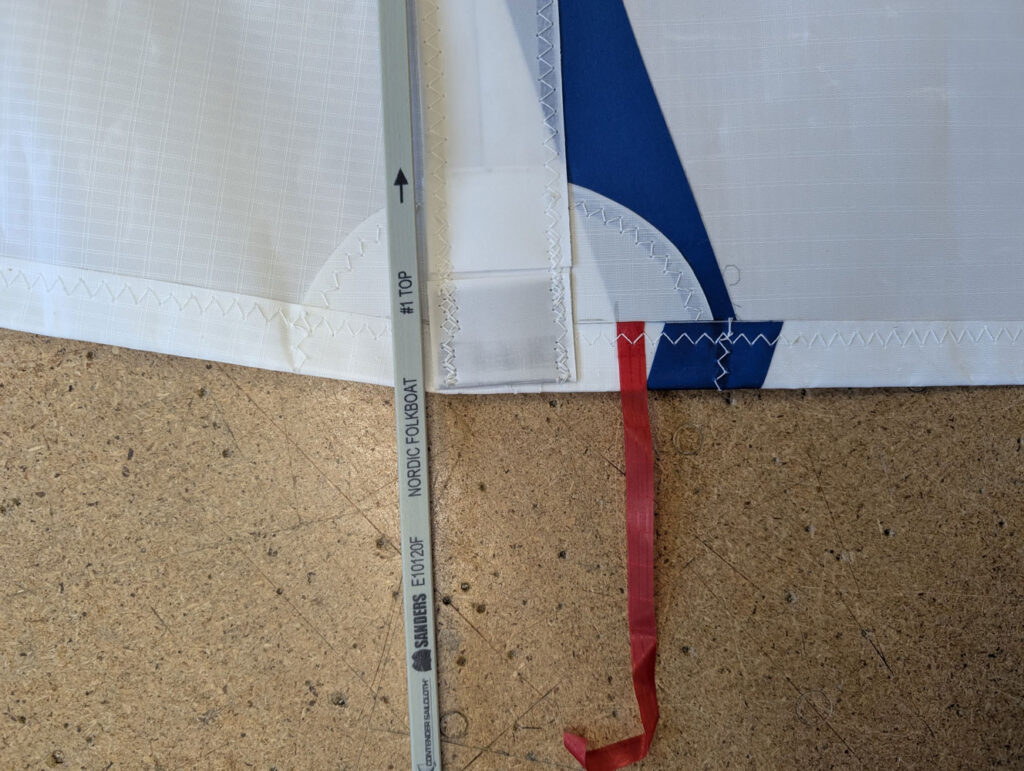
Step 1: Prepare the Sail and Battens
Slip-in elastic batten pockets are most commonly used on dinghies and smaller keelboats. Batten tension is created by an elastic webbing retainer at the inboard end of the pocket, which holds the batten firmly once installed. These pockets are designed for tapered leech battens, so identify your battens first and check for any numbering to confirm the correct order. Lay the sail out flat with the leech facing towards you.
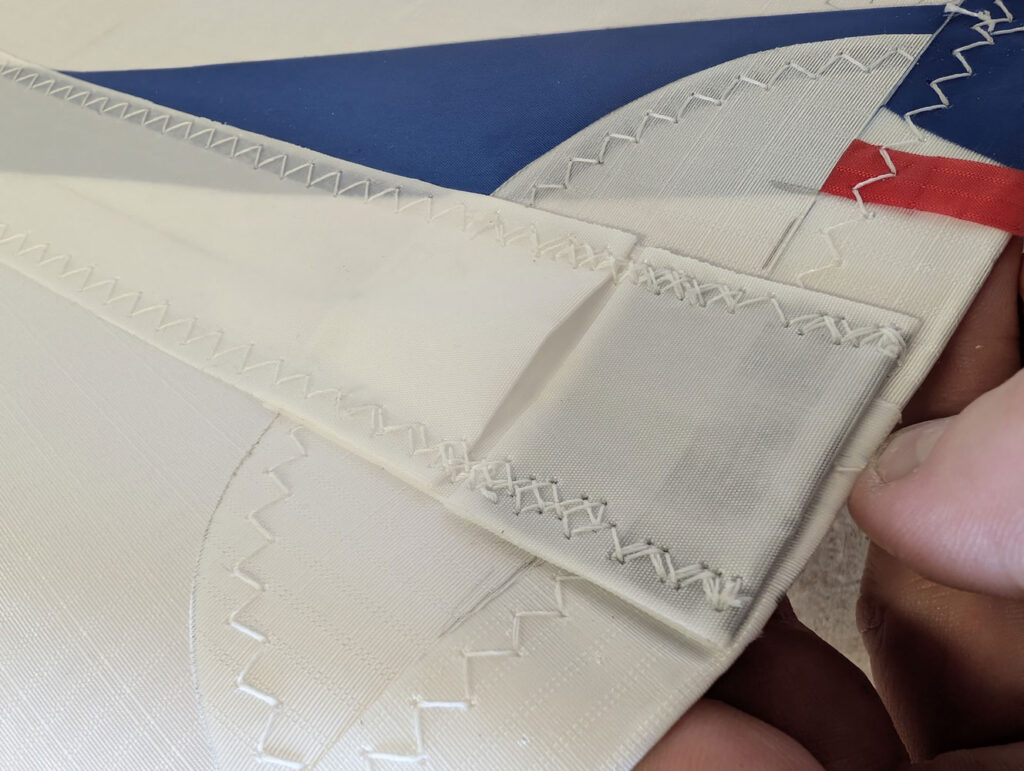
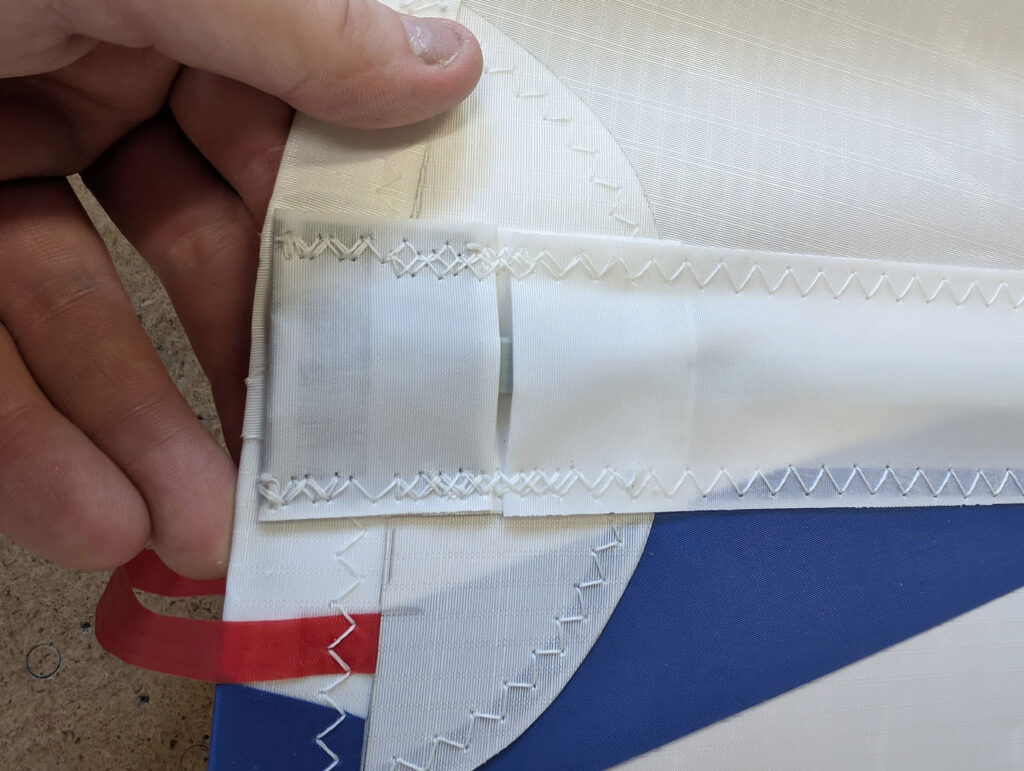
Step 2: Insert the Batten
Locate the small access slit in the batten pocket, typically around 50mm (2”) in from the leech. Insert the batten through this slit, feeding the thin tapered end first and sliding it carefully into the pocket. Keep the sail flat and guide the batten smoothly so it seats cleanly without forcing.
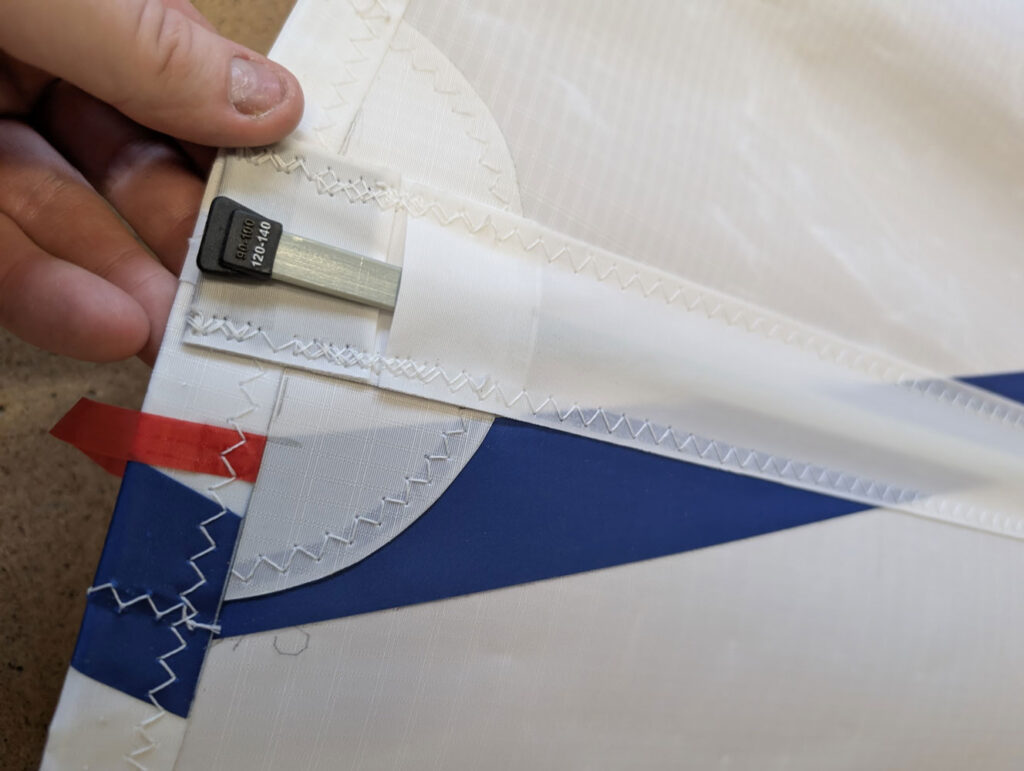
Step 3: Secure the Batten
Continue pushing the batten inboard towards the luff, applying gentle pressure against the elastic webbing at the inner end of the pocket. Once fully inserted, peel the leech section of the pocket open slightly to allow the elastic to pull the batten back and seat it firmly against the leech end of the pocket.
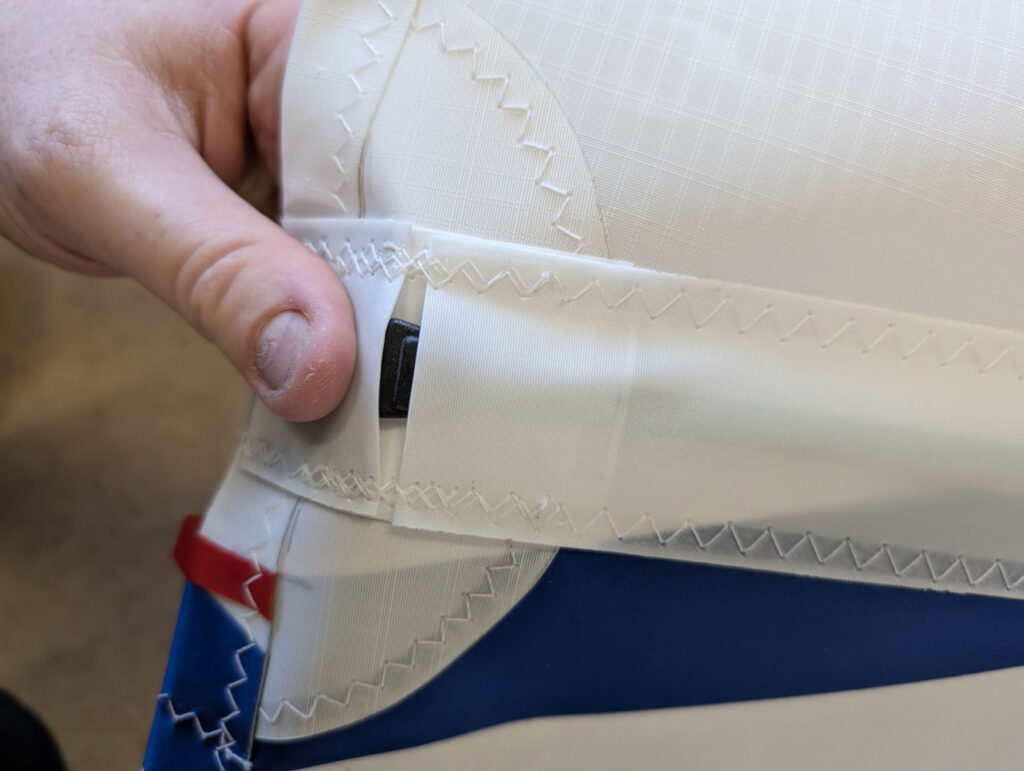
Step 4: Position and Repeat
Finish with a gentle shake of the sail to confirm the batten is sitting right at the back and held securely. Check the batten is secure at the inner end of the elastic as well as the leech. Once confirmed, move to your next batten pocket and repeat.